How to mint Solana NFTs using Candy Machine V2 [includes code]
Scripts and code to make you a pro ape NFT maker in the Solana ecosystem

In this tutorial, we will mint NFTs on Solana using the Candy Machine v0.0.2.
Prerequisites
Minting an NFT is the process of creating a token, freezing its maximum supply to 1 and attaching Metaplex NFT standard JSON to it, so a wallet can render it. This process requires you to have:
- some understanding of bash scripts, and a terminal
- some knowledge of Git and Node
- Solana CLI tools [installation guide]
End results
By the end of this tutorial, you will have 5 NFTs on the Solana devnet and a website to run a sale. We will also add a script to mint NFTs to your wallet via the CLI.
The cover image of this article was created using graphics from Candy Machine Vectors by Vecteezy and Monkeys Vector by Brgfx on Freepik.
Step 1: Prep your images
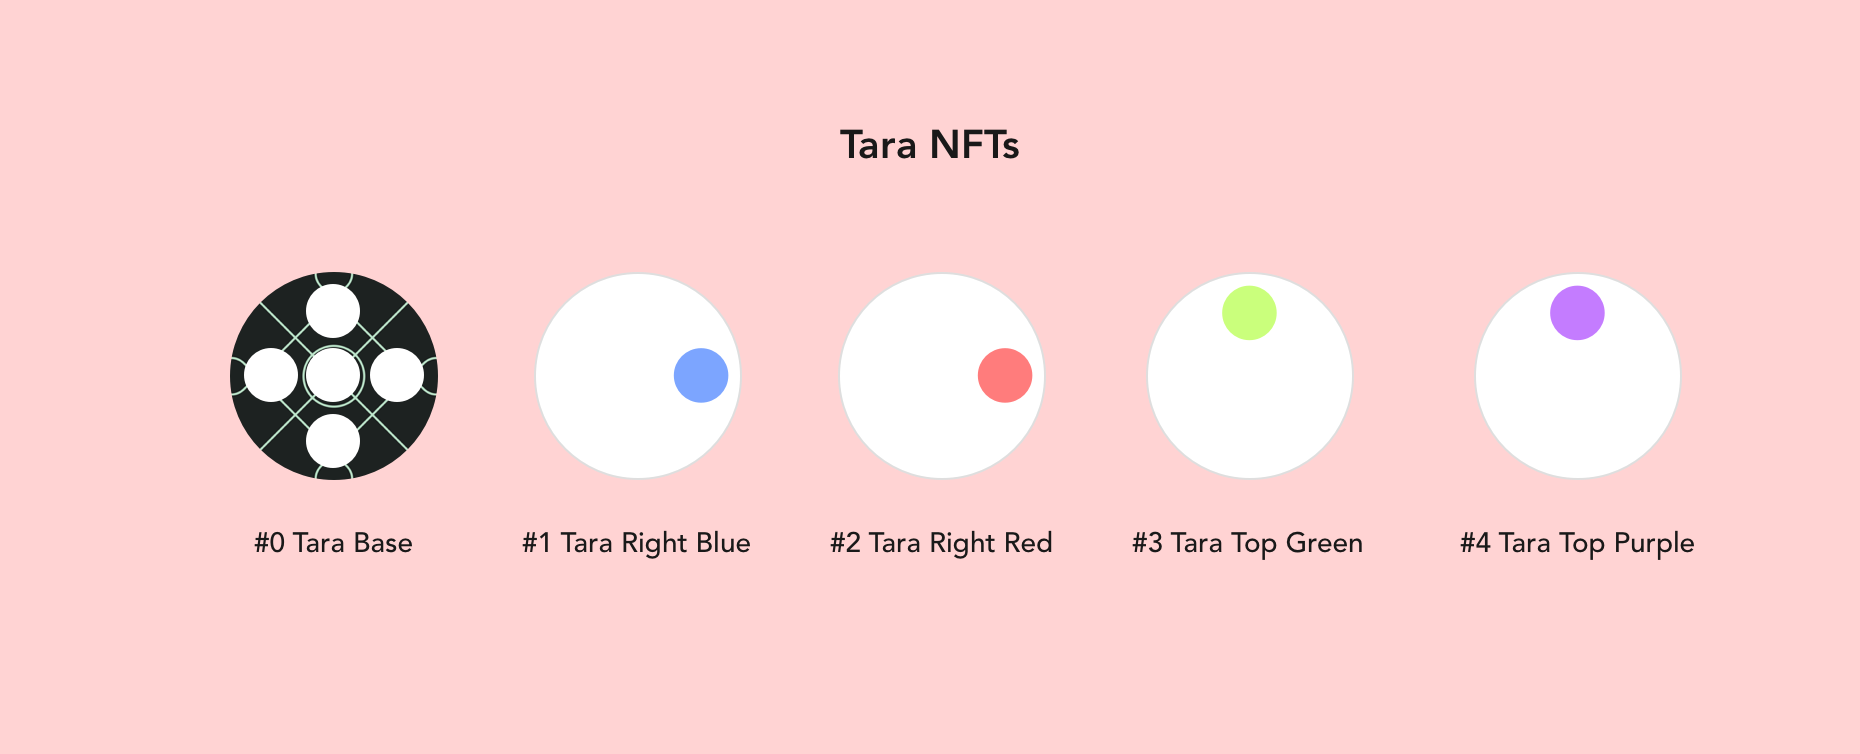
We are going to build an upgradable NFT project on top of the Meta Blocks protocol. We have created these 5 images that can be joined together. This collection will be called "Tara".
You use this guide, even if don't plan to be upgradable via Meta Blocks protocol. The process for minting a Meta Blocks compatible collection is the same as minting a normal NFT collection.
You can download these images here.
Step 2: Setup Metaplex locally
Metaplex offers a suite of tools and smart contracts (programs) that will ease the process of creating NFTs. We will use the official CLI to mint our collection.
Step 2.1: Pull CLI from Github
Open the terminal app on your computer. cd into a directory where you want to store the Metaplex related code. In my case this will be ~/Desktop. Then clone the repository:
cd ~/Desktop
git clone [email protected]:metaplex-foundation/metaplex.git
You should see the following files in the newly created metaplex folder:
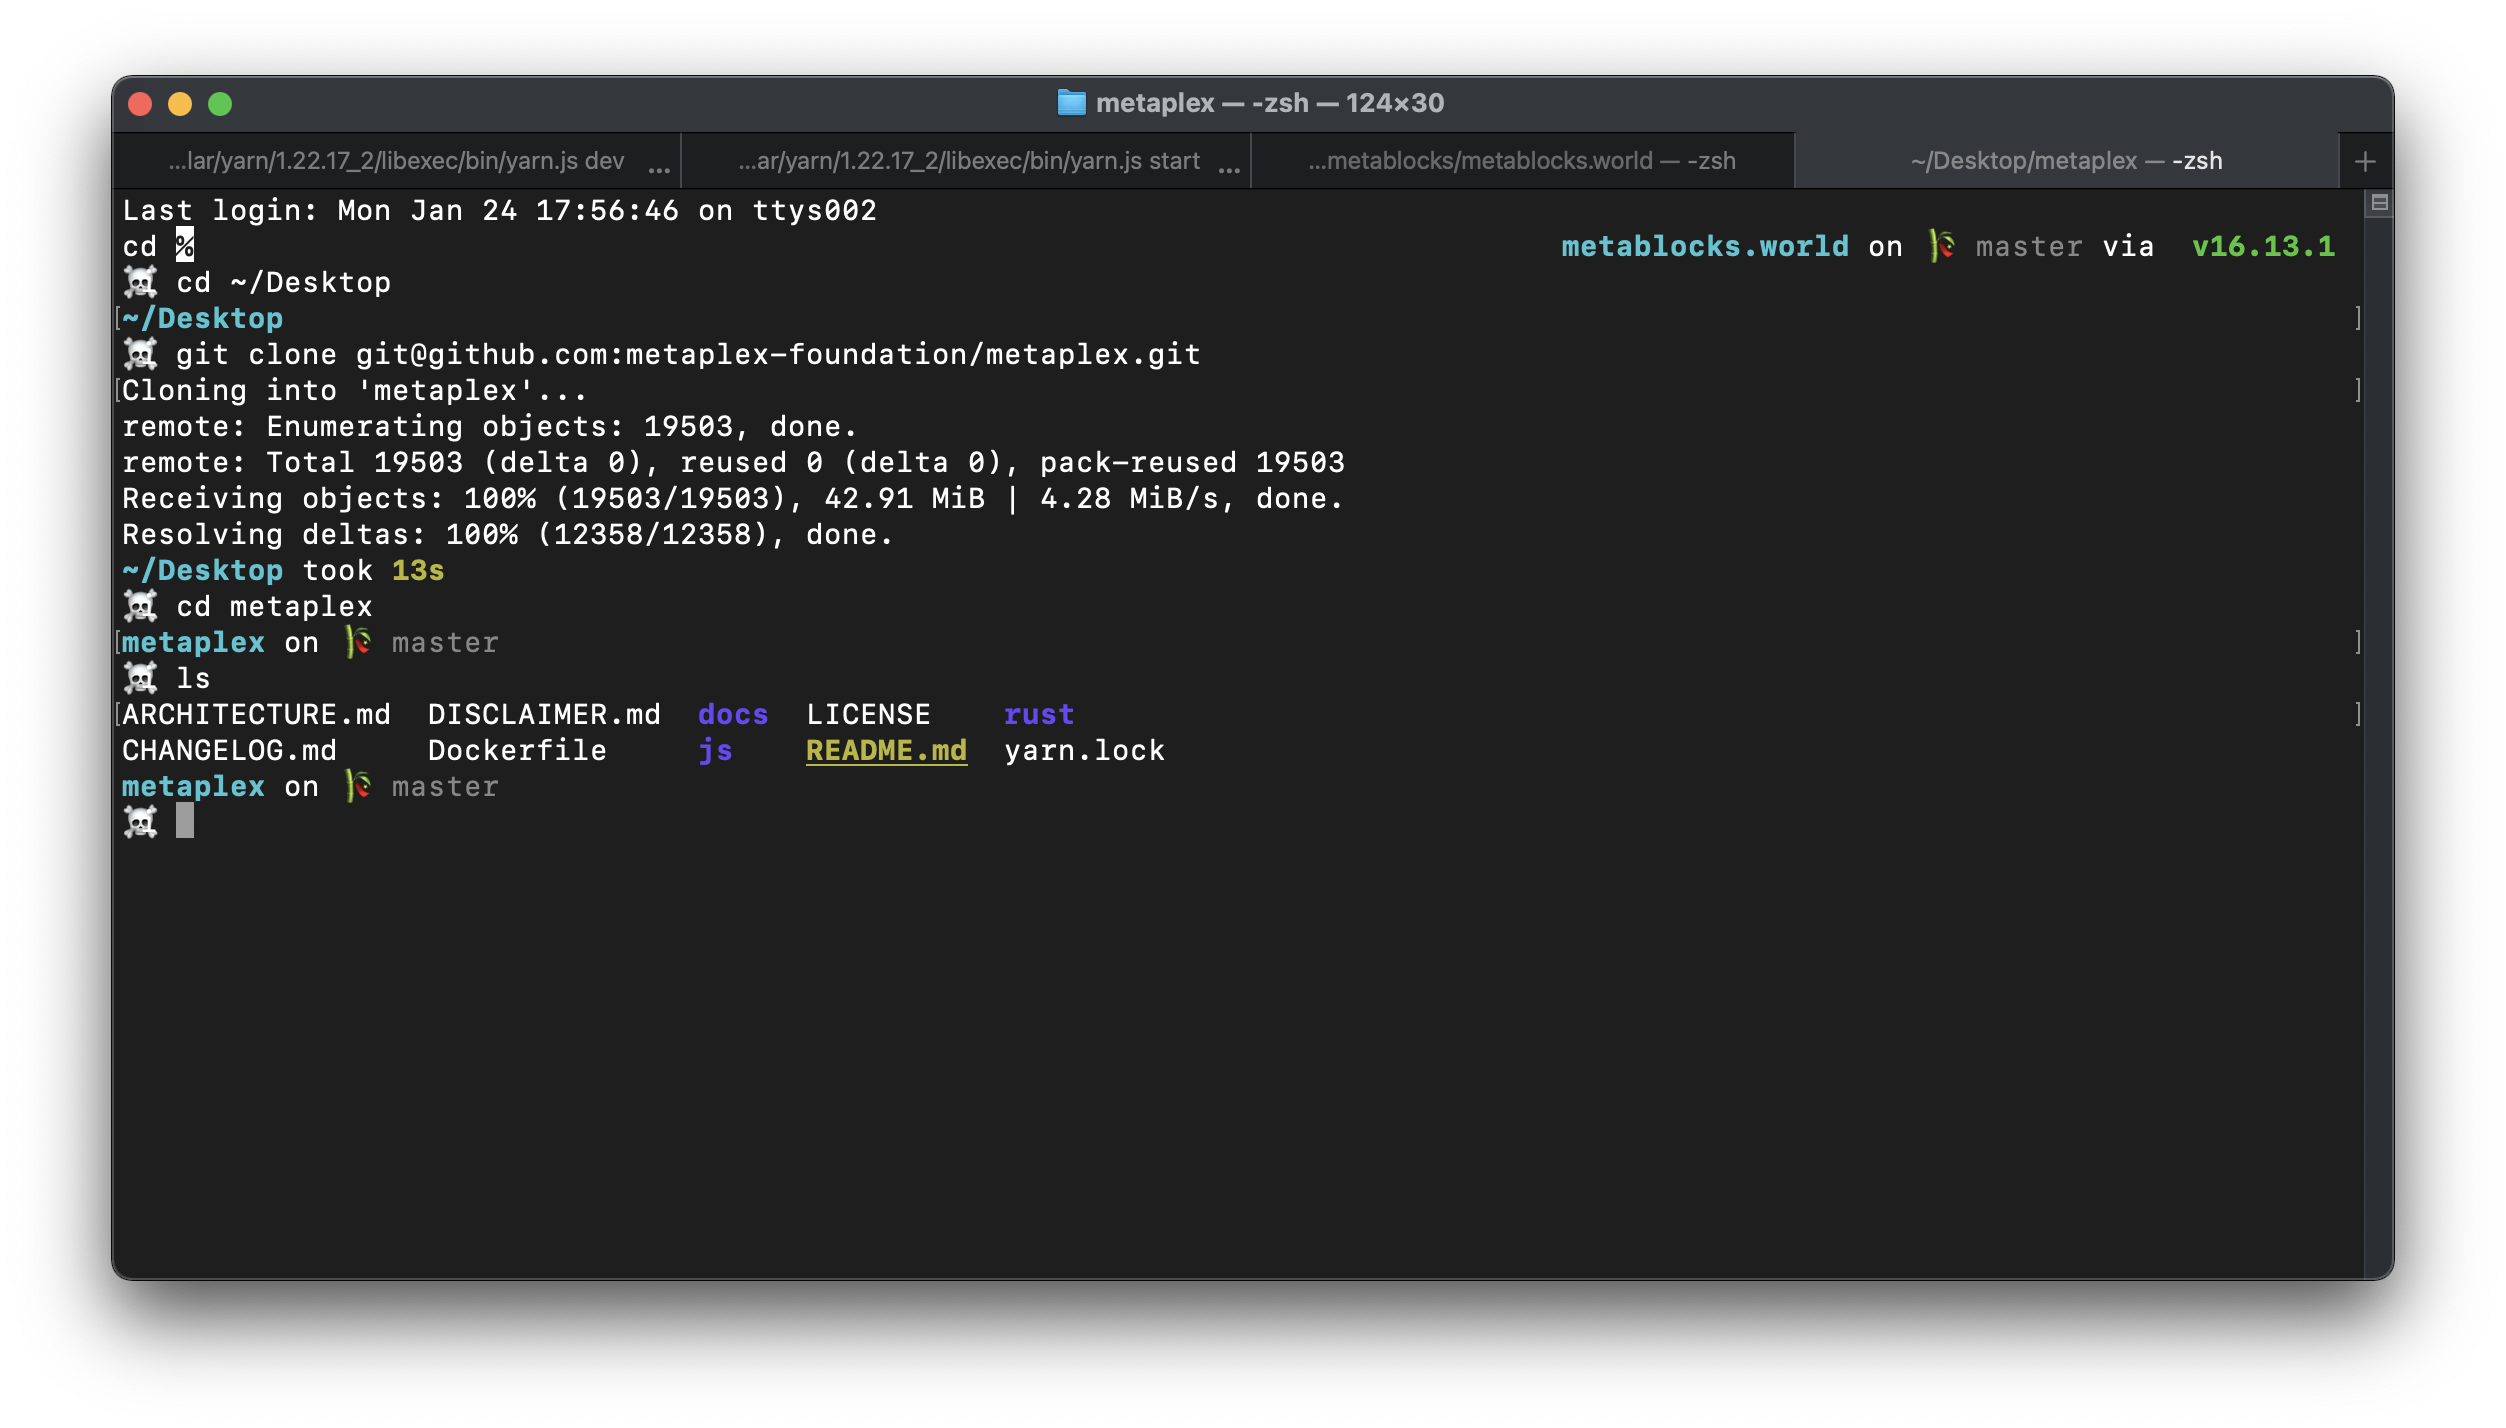
Screenshot of the files inside the Metaplex folder
Step 2.2: Build Metaplex CLI code
We have the code but it's not usable yet. We need to fetch its dependancies and compile it. The Metaplex package comes with multiple packages, but we only care about cli. To do this, goto the js/packages/cli folder inside metaplex, and execute the following commands:
cd packages/cli # we only need to work with CLI
yarn # installs all dependencies
yarn build # compile typescript code to node
This will create a folder named build in the cli folder. If you run node ./build/candy-machine-v2-cli.js, you should see the following output:
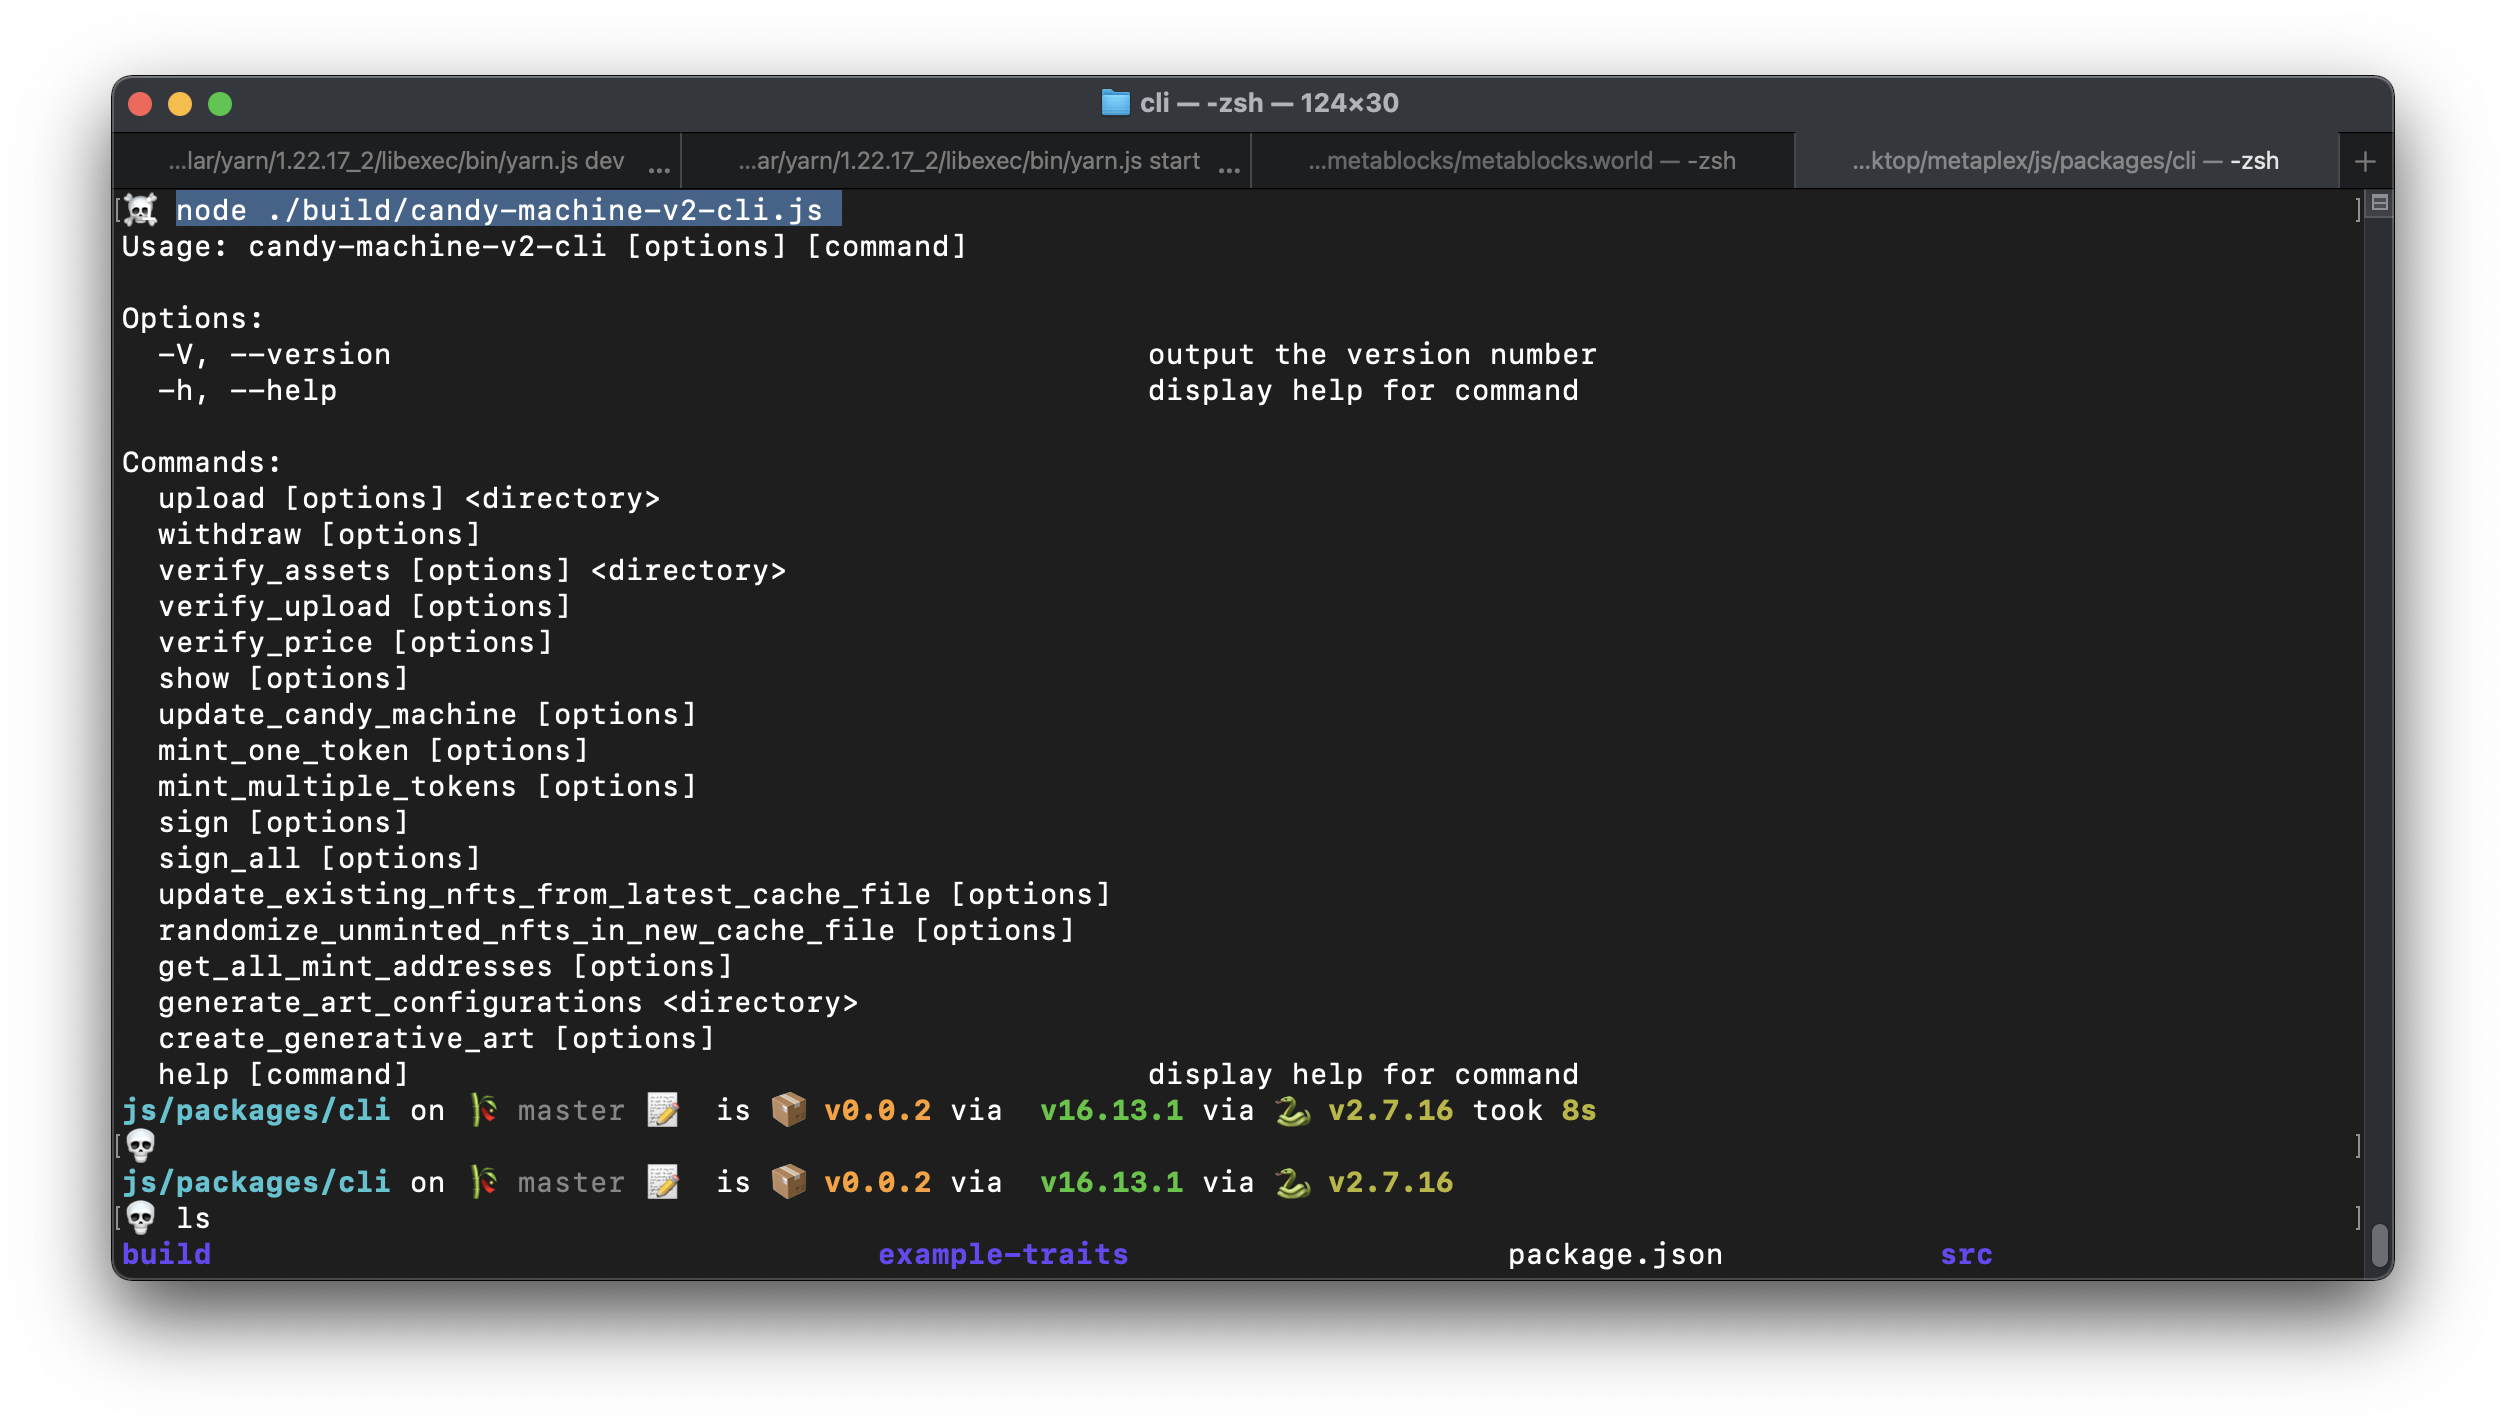
Successfully built Candy Machine CLI output
Step 3: Prep Metaplex NFT config
Each asset (image/video etc) that you want to publish as an NFT needs an accompanying Metaplex config. This config is built to comply with Metaplex's Token Metadata Standard. In less technical terms, Metaplex designed a standard that to store NFTs on Solana, an everyone in the ecosystem adopted the standard.
From the point of view of the creator, you can think of this config as a way to specify the attributes, commissions and aspects of your NFT.
Since we have five assets, we need five configuration files. According to Metaplex, the numbering of the files start at 0. So for our 5 NFTs in the "Tara" collection, we will have the following files (total 10):
- 0.png, 0.json for Tara Base
- 1.png, 1.json for Tara Right Blue
- 2.png, 2.json for Tara Right Red
- 3.png, 3.json for Tara Top Green and
- 4.png , 4.json for Tara Top Purple
Step 3.1: Create a folder for Tara project
We will create two folders called tara and tara/assets in metaplex/js/packages/cli:
cd ~/Desktop/metaplex/js/packages/cli
mkdir tara
cd tara
mkdir assets
assets folder stores on-chain assets and the tara folder will be used to store keys and config. This is just our personal preference. These folder names can be anything.
Step 3.2: Move 5 "Tara" images to the tara/assets folder
Make sure that you name then 0.png, 1.png and so on.
Step 3.3: Create the file 0.json for the first NFT
This file will have the following content:
{
    "name": "Tara Base Card",
    "description": "Tara universe is a demo project to showcase the power of Meta Blocks Protocol. This base card is where the story begins.",
    "image": "0.png",
    "attributes":
    [
        {
            "trait_type": "texture",
            "value": "futuristic"
        },
        {
            "trait_type": "slots",
            "value": 4
        }
    ],
    "symbol": "TaraBase",
    "seller_fee_basis_points": 1000,
    "collection":
    {
        "name": "Tara Universe",
        "family": "Meta Blocks Samples"
    },
    "properties":
    {
        "files":
        [
            {
                "uri": "0.png",
                "type": "image/png"
            }
        ],
        "category": "image",
        "creators":
        [
            {
                "address": "8J4tQgSifp1ibwXbMVBBKjry1YoSaoSLSMTkYQjsyzUA",
                "share": 100
            }
        ]
    }
}
In this configuration:
- You can add as many attributes as you want in
attributesarray - Alternate file types (like video) in the
filesarray - For additional files, make sure you use the correct
files.type - The royalty you get per trade in
seller_fee_basis_points(1000 basis = 10% royalty, 10000 basis = 100% royalty) - Add your wallet address in
creators.address - If there are multiple creators, you can specify the share split of royalties
- Share = 100 signifies that 100% of the royalties for goto this creator
Step 3.4: Create configuration for all NFTs
You can create a script to generate the configuration for you. If you are following along with the example, you can find the 5 json files and images here.
After this, your assets are ready (assuming you didn't make any typos). The next step is to prepare the candy machine.
Step 4: Prep Candy Machine Config
The candy machine config lets you set the price, mint date and other attributes of the collection. To configure this, create a file called config.json in js/packages/tara:
{
    "price": 0.001,
    "number": 5,
    "gatekeeper": null,
    "solTreasuryAccount": "8J4tQgSifp1ibwXbMVBBKjry1YoSaoSLSMTkYQjsyzUA",
    "splTokenAccount": null,
    "splToken": null,
    "goLiveDate": "25 Dec 2021 00:00:00 GMT",
    "endSettings": null,
    "whitelistMintSettings": null,
    "hiddenSettings": null,
    "storage": "arweave",
    "ipfsInfuraProjectId": null,
    "ipfsInfuraSecret": null,
    "awsS3Bucket": null,
    "noRetainAuthority": false,
    "noMutable": false
}
The important keys to change are:
price: price of each NFT in SOLsolTreasuryAccount: public address that receives the funds from sales
To get more info about each key value pair, refer to the official Metaplex documen at https://docs.metaplex.com/candy-machine-v2/configuration
Step 5: Generate a keypair for uploading these assets
We need a Solana wallet to make contract calls to create these NFTs. Let's create one in js/packages/cli/tara:
solana-keygen new --outfile keypair.json
We are working on the devnet at the moment, so make sure that your network is set to devnet
solana config set --url https://api.devnet.solana.com
solana config get # will show the current config
Finally, you need some SOL to pay gas. You can request some using airdrop:
solana airdrop 2 -k ./keypair.json
The above command will give an output similar to:
Requesting airdrop of 2 SOL

Signature: Kme6a2HjbiWCi3hVcqa8qAPcZHmC6kCQhNSVHKT9NyNacpKZ12uxE3GjDVsDHj8TbXtAGdh4An2qSYa9uKe8Hzt

2 SOL
It's a good idea to test your collection on Devnet first. When done, you can change the network to Mainnet-Beta.
Step 6: Upload the assets
In the js/packages/cli/tara directory, run the following command to upload the assets to Arweave:
node ../build/candy-machine-v2-cli.js upload \
    --env devnet \
    --keypair keypair.json \
    --config-path config.json \
    --cache-name taracache \
    ./assets
On successful completion, you will get an output that looks like this:
Beginning the upload for 5 (img+json) pairs
started at: 1643379208383
Size 5 { mediaExt: '.png', index: '0' }
Processing asset: 0
initializing candy machine
initialized config for a candy machine with publickey: AuuLoYV9kx8HKWrpnJCT5whgURqd5MwxckWesL5arqh
Processing asset: 0
Processing asset: 1
Processing asset: 2
Processing asset: 3
Processing asset: 4
Writing indices 0-4
Done. Successful = true.
ended at: 2022-01-28T14:14:26.735Z. time taken: 00:00:58
Take a not of the candy machine public key. For us, it is AuuLoYV9kx8HKWrpnJCT5whgURqd5MwxckWesL5arqh
At this point, you can check the .cache folder to see the urls of the NFTs on Arweave.
If the command fails, you can run it again. The command is smart enough to resume uploads. If you are uploading a lot of images, you might need more than 2 SOL.
NOTE: If you are not able to upload at all, you can try to clear the cache and try again. The cache folder is hidden and called .cache
Step 7: Verify uploads (optional)
To ensure that the upload process, you can run the verify command as follows:
node ../build/candy-machine-v2-cli.js verify_upload \
    --env devnet \
    --keypair ./keypair.json \
    --cache-name taracache \

wallet public key: 9WS1ezpcxDVfA8cWGzDswCxfXWPtc6xcrkEk9gN6PWh8
Key size 5
uploaded (5) out of (5)
ready to deploy!
It's recommended to run the verify command, but it's possible that you like taking risks. Maybe you live life on the edge. In that case you can skip this step.
Step 8: Choose a delivery mechanism
At this point, your NFTs are ready on the chain. Now you can decide to:
- Mint them to your wallet via the command line or
- Generate a candy machine website where users can mint their own
The advantage of the latter approach is that the gas fee of the mint is paid by the user.
If you decide to create a website, you can follow the steps outlined here: https://docs.metaplex.com/candy-machine-v2/mint-frontend. The value of the variable REACT_APP_CANDY_MACHINE_PROGRAM_ID is the public key of the candy machine computed in Step 6 (AuuLoYV9kx8HKWrpnJCT5whgURqd5MwxckWesL5arqh).
If you decide to mint the NFTs to your own wallet, you can do it via the CLI:
node ../build/candy-machine-v2-cli.js mint_multiple_tokens\
    --env devnet \
    --keypair ./keypair.json \
    --cache-name taracache \
    --number 5
The above command will try to mint 5 NFTs by reading the taracache. This cache was created in the upload process. You can pass any number in place of 5.
The NFTs will be stored in the wallet related to keypair.json. You can add this keypair to Phantom to check the NFTs.
A successful output will look something like:
Minting 5 tokens...
wallet public key: 9WS1ezpcxDVfA8cWGzDswCxfXWPtc6xcrkEk9gN6PWh8
No instructions provided
No instructions provided
transaction 1 complete 61H3Ai5UPqDzLQ8fobZbN3zAnXycSKgt5vyqMB9eXuVWotH6hodwyCj1HnKNe3ynRybxdUiLZeCuwYs98V15WRV3

...

minting another token...
wallet public key: 9WS1ezpcxDVfA8cWGzDswCxfXWPtc6xcrkEk9gN6PWh8
No instructions provided
No instructions provided
transaction 5 complete 4yBqTztycEPqRMZTZTQadRC4DBkdcBgUhSFvkrmHhcg8LsiGx1NrxtUTJjVjcSsPu42Vwe5Bhxh5B8GKrE3YE1PS

minted 5 tokens
mint_multiple_tokens finished
After running this command, you should see 5 NFTs in your wallet. Make sure you switch the network to devnet:
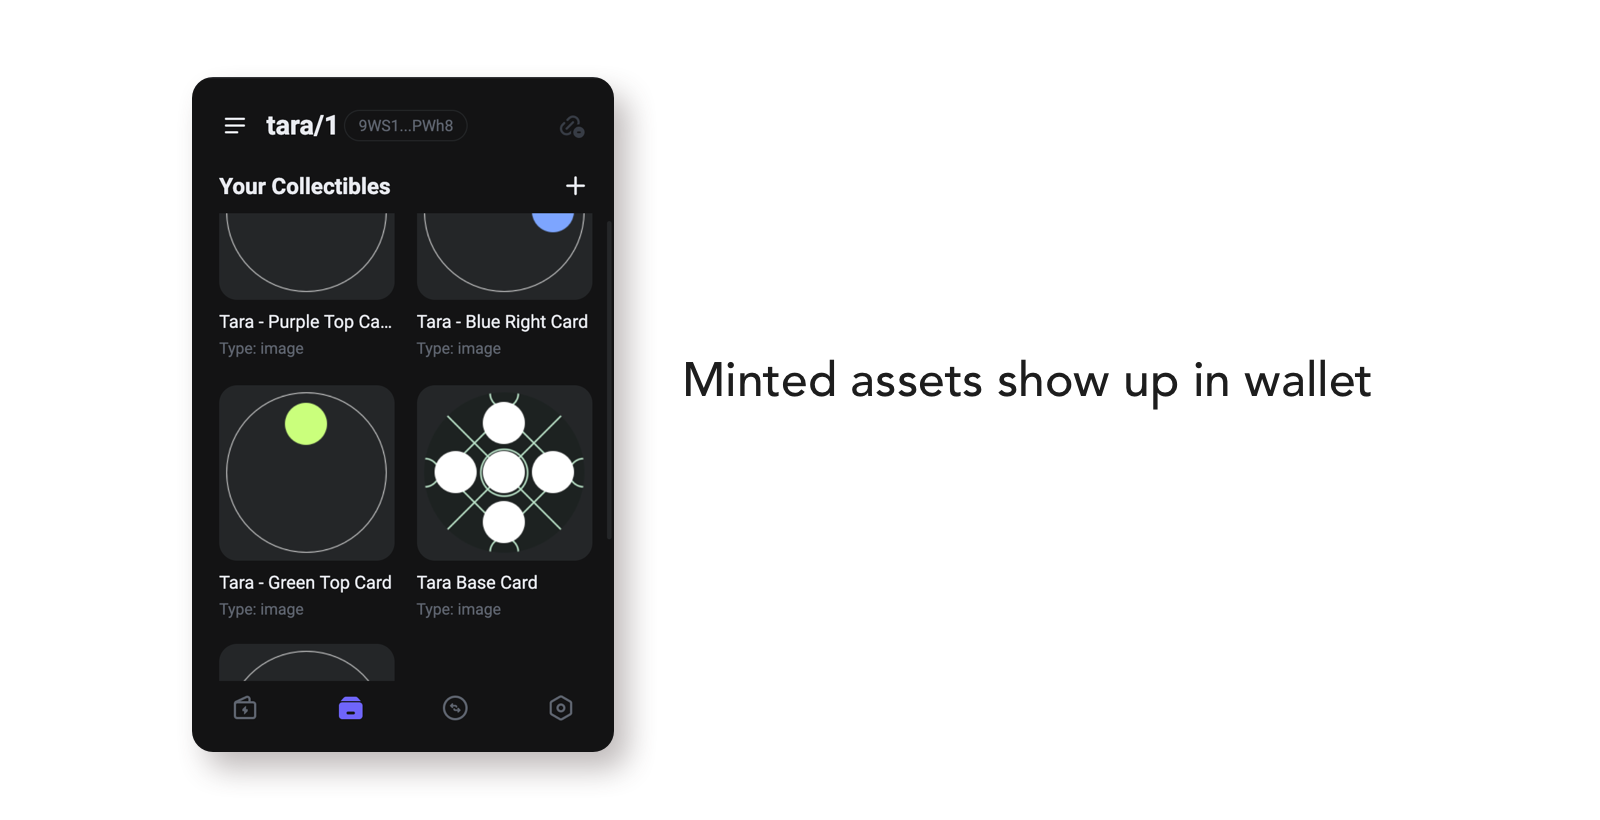
NFTs show up in Slope wallet
Next steps
Now you have minted your awesome NFT collection. You can sell them, build a community around them, or keep them in your wallet forever.
If you are building a richer application, or want NFTs that can upgrade overtime, checkout the Meta Blocks protocol.